 |
Please note that WebCloud is only supported on Firefox, Chrome, and Safari. If you are using other browsers, please switch to one of the three.
WebCloud is built using Javascript and supports Mac OS X, Linux, and Windows. Choose your operating system and browser combination below for installation instructions. In brief, you want to use an automatic proxy configuation URL of http://webcloud.ccs.neu.edu/proxy.pac
Mac OS X
Safari & Chrome
- Open System Preferences and click on Network.
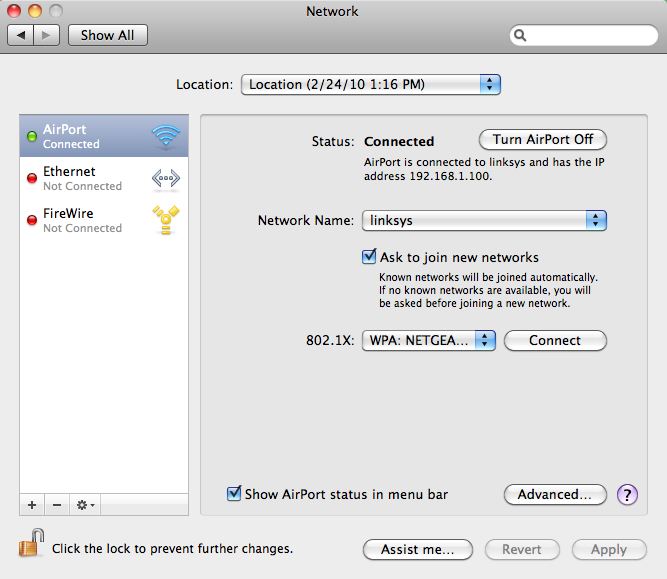
- On the left side, select your primary Internet connection, and click on Advanced.
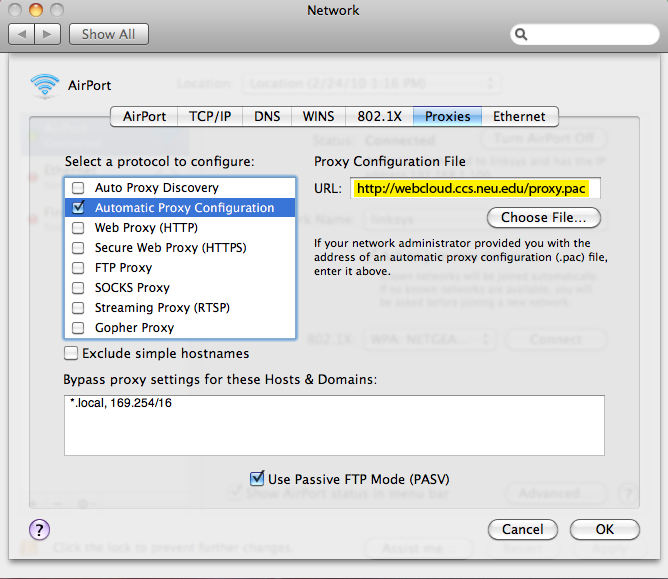
- Select Proxies, check Automatic Proxy Configuration, enter http://webcloud.ccs.neu.edu/proxy.pac into the URL field.
Firefox
- In Firefox, Preferences from the Firefox Menu, and select Advanced.
- Select the Network tab and click on the Settings... button.
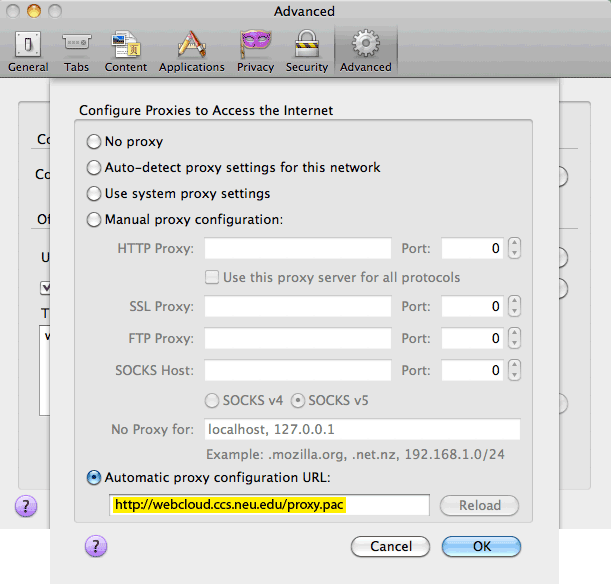
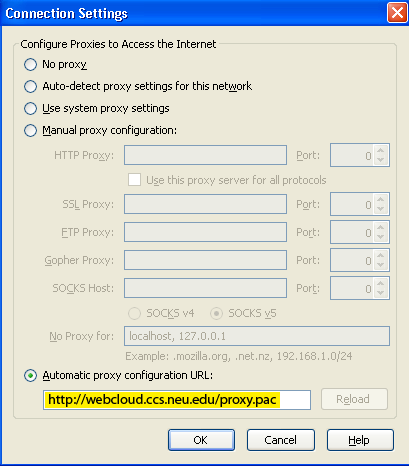
- Select the option Automatic proxy configuration URL: and enter http://webcloud.ccs.neu.edu/proxy.pac into the field.
Windows
Safari
- Preferences from the Settings menu, and select Advanced.
- click on "Change Settings" for Proxies
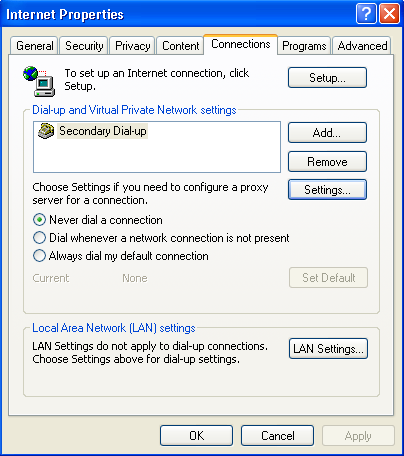
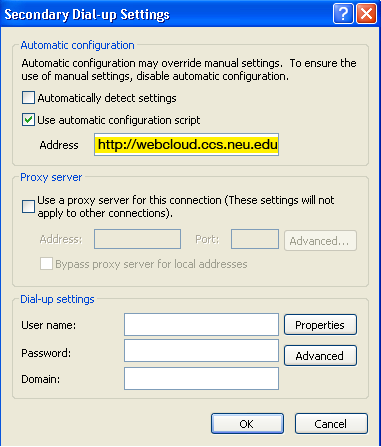
- Choose Connections, click Settings, check "Use automatic configuration script", and enter http://webcloud.ccs.neu.edu/proxy.pac into the field.

Chrome
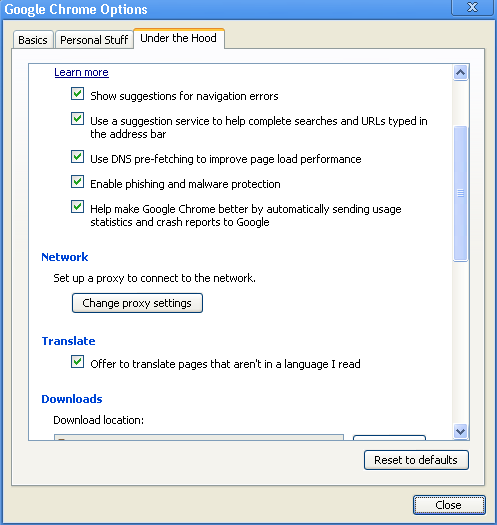
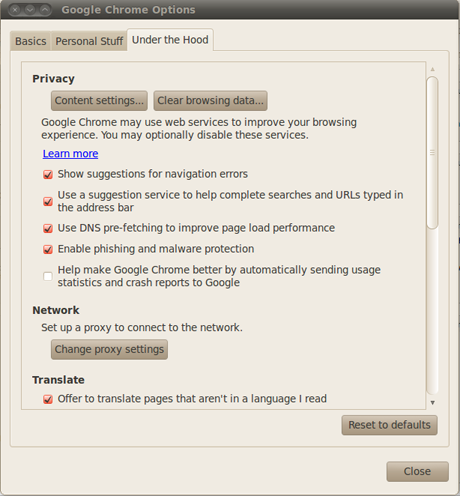
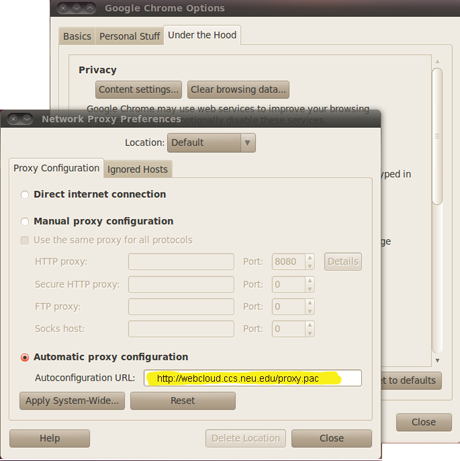
- In Google Chrome options, choose under the hood.
- In Network, click "change proxy settings". Choose Connections, click Settings, check Use automatic configuration script, and enter http://webcloud.ccs.neu.edu/proxy.pac into the field.
Firefox
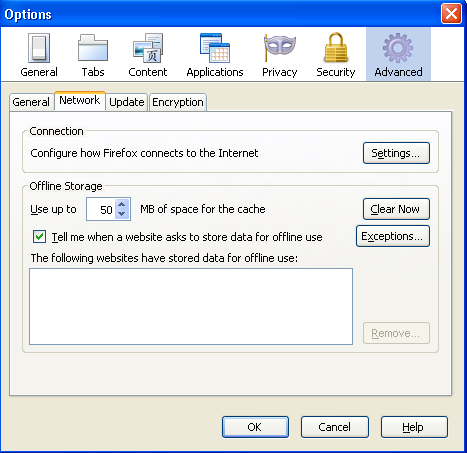
- In Firefox, Options from the Tools menu, and select Advanced.
- Select the Network tab and click on the Settings... button.
- Select the option Automatic proxy configuration URL: and enter http://webcloud.ccs.neu.edu/proxy.pac into the field.
Linux
Chrome
- In Google Chrome options, choose under the hood.
- In Network, click "change proxy settings". Choose Connections, click Settings, check Use automatic configuration script, and enter http://webcloud.ccs.neu.edu/proxy.pac into the field.
Firefox
- In Firefox, Options from the Tools menu, and select Advanced.
- Select the Network tab and click on the Settings... button.
- Select the option Automatic proxy configuration URL: and enter http://webcloud.ccs.neu.edu/proxy.pac into the field.
Uninstalling WebCloud
In order to uninstall WebCloud, simple follow the same instructions you used to set it up, execpt remove the http://webcloud.ccs.neu.edu/proxy.pac entry. This will immediately and permanently remove WebCloud from your system.